Saturday 29 January 2011

Image sizes!


We've all been assigned our real jobs and tasks for the term^^ Not completely but me and Michelle have a fair bit of work to share between us! =D

We're supposed to be working on the intro scene to SMITTEN, But the project file Matt uploaded to A-Drive seems to be for Premiere Pro, so we havent been able to work on the shot since the layers have been clearly drawn out in the working animatic.
Instead, we've been working on the separate backgrounds we allocated ourselves during the holidays. I've been trying to work out the measurements for the panning shots in the forest.
Our image sizes would be 1080x720, However, the panoramic would obviously be much longer.
I collected the 3 main points from the colour script in which Matt has imagined the shot to look like. the camera moves slightly higher at the end of this shot. MEANING, the image would have to be slightly higher then I imagined. I worked out, the image would be 3 times wider then its original size, and about a 3rd higher then 720.

so... 720 divided by 3 = 240,
720+240= 960
1080x3= 3240

so our new measurements theoretically will be........ 3240x960!
/i will go over this with the team, then come up with a final decision, since the measurements haven't been officially decided yet.

Monday 17 January 2011

Brush Test

After an in depth study of different chinese artists and the methods they use, I then created this..
As you can see the black outlines are less harsh as before, The MayFly's outlines is also in moderation, didn want to over do it so I copied the way I coloured it in the first concept image of it. (The blue one) I feel as though, the mayfly would need a second tone. In the original concept, I gave it a purple tint to work along aside the blue for that ghostly feel. However, I've done a few tests, and adding greens.. purples.. or blues still look kind of weird. The only look that was acceptable was to go down a browner route.

Monday 10 January 2011

Textures...

I'm currently working on different ways of portraying a very patchy look for the stone walls. I remember watching Grand Design with Kevin McCloud explaining out different coloured cements used would give a castles outer appearance alot of difference. He was applying different mixtures of with different amounts of line stone in it etc. So I decided, since we're aiming to NOT use any outlines for the backgrounds. I figured, we could use LIGHTER colours of the same shade of the objects as the outline colours. And heres the outcome. It doesn't look too bad actually, I might play around with a slightly different tone. Like, a tint of purple perhaps?

Its a shame this unit has "ended" but continue to upload my progress in the same way. =D
I've found its helped me with my creative thinking since I'm logging the progress. Its nice to see what I planned to do, and actually finished, and how its helped my projects advanced.^^

Sunday 9 January 2011

Okami VISUALS!!

During our meeting on the MAYFLY project, me and Iredia both agreed, Okami the PS2 game from years ago was a very inspiring and one of the most successful games which used painted brushes to express outlines and the characters authenticity, as the design linked to asian themes.

http://dayfly89.blogspot.com/2011/01/styles-to-work-with.html

watercolours:


Thicker Ink lines:


other styles with less dominating calligraphy lines.


Iredia has done a brief visual analysis of several images from Okami. I'll carefully studying each point to try grasp his visual despair. We still haven't decided on the final look for the background. And since we've both decided to use TVPAINT ONLY, its been a long journey to even creating acceptable images. I've grasped some basic skills from tutorials, and have even gone through forums for the Chinese paint brush textures. But actually controlling the brushes has become a bit of a challenge.

As you can see here ::


I did this as a quick test of the calligraphy brushes, It came out quite well! The Mayfly would obviously not be animated in such thick brush strokes but more consideration in how we portray this character is needed. This would all be determind after I've finished the other tests this week.

I even went over one of iredia's flight tests for the mayfly. Originally, I was given a folder that was over 300 frames long!! But then after looking through them, 200 odd frames were in fact empty! So that was a relief. I know its not something to complain about, since the final thing will probably have thousands of frames to go over!

Heres the Test animation with the brushes. Its not visually amazing, but its a start for the overall FEEL for the atmosphere.


After having a video conference with Iredia over our progress and so on, I pointed out, the character IS pretty flicky. He has mentioned we would be the only group with that traditional flicky feel from our project. But this seemed too much. I went over the MAYFLY character with a THICK brush, I personally didnt find it convincing, it was probably because the frames were so fast, the audience don't have the chance to even see the textures let alone study it.

Another thing is, Iredia pointed out the Mayfly animation was alot faster then his original test. And I couldnt figure out why, I sent him the project file for him to check out.
I totally forgot about the basic settings, from the fps and size. I've noticed, after drawing for long hours, my technical thinking don't come in, so i'll have to keep that in mind before I render out scenes in the wrong settings! = wasting our precious time!

-----------------------------------

I actually got this feedback from him:

"hey yuki i figured out the problem- the import settings you had were 30 frames per second, so because the animation is 24, it cut out certain frames & also sped it up- I've done a correct settings import with the frames cut to the exact right time that the animation stops- so i'll send this 2 you asap. so hopefully sometime this week, (give it a few days break after today of course), you can have one more go?

here are specific changes I feel need to be made for the next attempt:

*As little flickering as possible with the colouring (this may mean you need to really zoom in on the frames to make sure
that paintings are as close to each other as possible)- so that the painting matches the smoothness of the animation.

*no black outlines on the character - when they flicker its really obvious and distracting- I want the outlines similar to your 1st mayfly painting you showed me, coloured so they blend in well with the colour of the mayflies body- (if this means you need to ditch the Chinese brushes for the characters body then do so- as long as we can have them in the awesome background you're gonna create).

I hope I'm not giving too much, if so please let me know- I just wanna make sure we're fully ready to start producing the film come the 24th "


"by the way don't do this for all 109 frame because I feel that may be a bit unfair, considering you did so well to attempt to tackle the whole thing today :D may b up to frame 56 Max "

and I replied with:

"ooOOO!!!! Forgot to set the settings xD My bad xD And dude, its ok, its understandable. I'll have another hack at it next week =D And the 109frames wasn't so bad actually =O I'll try get that done, don't worry =D "

Since I've chosen the route as an animation student, I have no time for excuses, its a path I've chosen myself, something I chose to ENJOY. And I really didnt feel much "pain" in going over someone elses animated frames. I actually have the feeling of correcting a few frames at the same time. Its a tedious job, but its also something I've agreed on. I can't let my team down, since Iredia's working just as hard on secondary effects such as water splashes, a challenge I would dread to do. Much respect for them water effects, as a fellow animation student I feel motivated to work even harder for him.^^

AND GOOD NEWS, I just received some Chinese books on the arts of Chinese painting, with some basics and some in depth thoughts from many famous artists. Its hard to read since its in simplified Chinese, Its like trying to read Shakespeare English!

So heres whats been decided for the next week:
-I'll be working on CONCEPTS directly on TVP
-I'll be working on diff ways of animating in TVP with an moderate usage of the thick lines.
-I'll also be animating the test again WITHOUT outlines so that it hopefully, cancels out the flicky feeling of my first test.

Wednesday 5 January 2011

some visual's from the 4th.


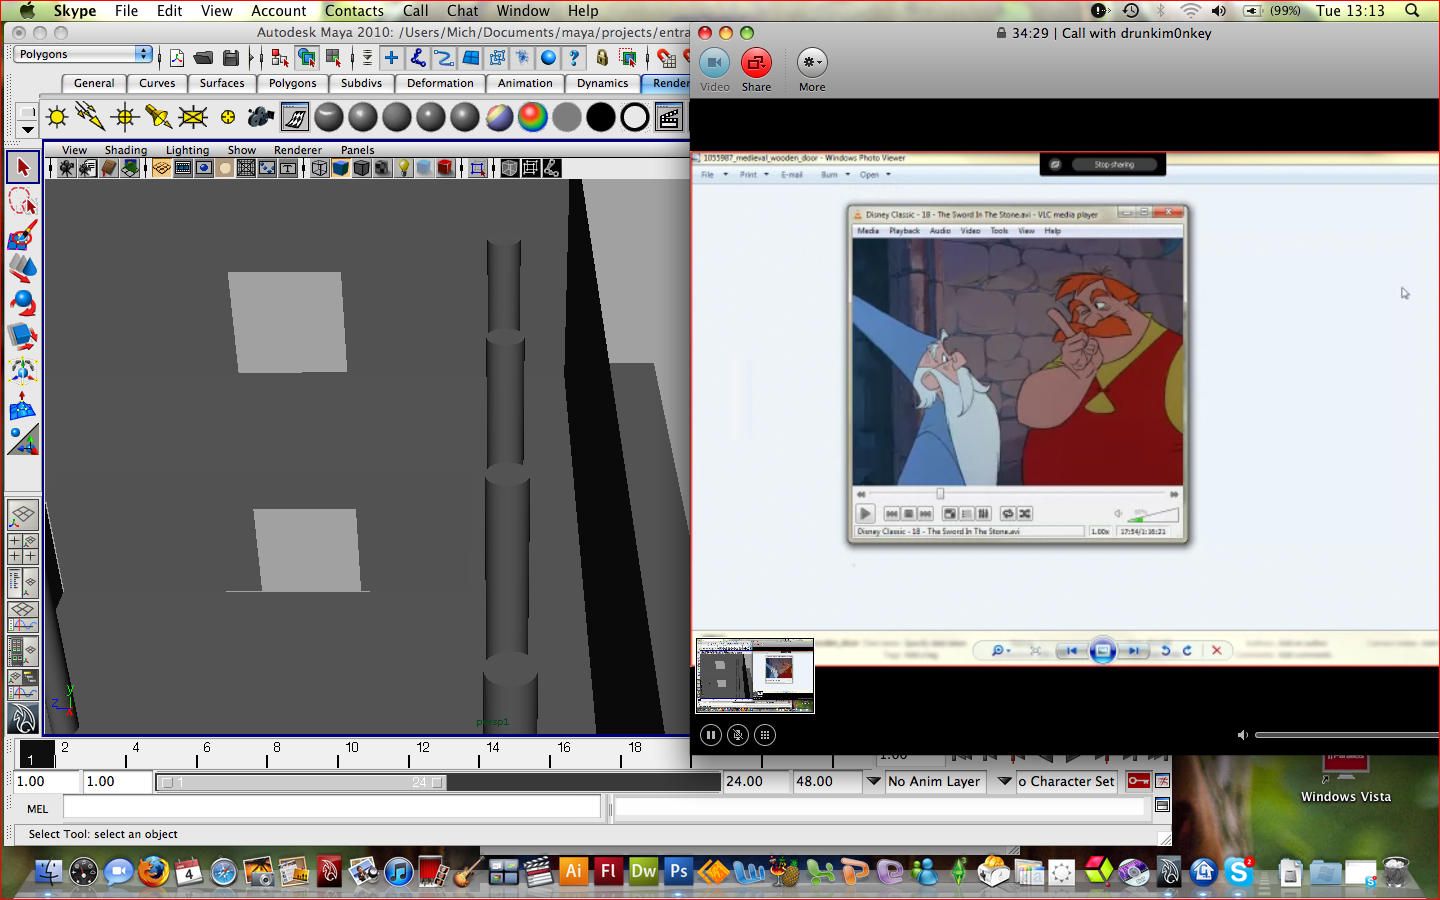
Some proof me and Michelle finally got skype working!! As you can see in the print screen above. YOUR actually looking at MICHELLE's monitor, thats viewing my computer at home =D
Heres a sketch of the wonky castle as Matt requested =D Its slightly abstract. We decided not to push it so far, so here is the outcome. As you can see, Matt loved my idea of keeping the princesses tower the tallest and the ONLY tower with a cone. So that element stayed. Truthfully, only the shaped and perspective of the design changed. Its a small simple castle thats not meant to have a massive impact of the audience for its size, but for the crazy-ness that happens inside after. I predict it should have the same feeling as watching alice and wonderland. The contrast of a little person stepping into a massive world. or the other way round. Its going to look like its a really small area, where not much is possible, but really its going to portray a whole lot more.

On the right hand side, I've suggested another design element that we could use. For the tiled floors and banners, we should incorporate our initials or something to form a logo or something? Afterall, its our master piece. Even the Pixar animators did the same. They all learn their basic skills in a room named A113. And included that very code name in almost all their movies. =D


Heres the front and a more 3D view of the castle, Its not symmetrical, which is the main aspect of its design. Just like the castle in Cindarella.

Here's the 3D block out Michelle made during term time =D

Here's my initial sketch I worked on through the Christmas holidays, I realised me and Michelle only discussed the interior of the ENTRANCE instead of the WHOLE entrance hall itself. As a room, it should have a minimum of two doors. As we debated whether we should add more character to the interiors design, we soon realised, most medieval interiors have ARCHES, and plenty of them!. So I carried on sketching LIVE on skype as Michelle carried on giving suggestions. We then decided the 3D block out Michelle made would need updating to help us along with the perspectives. And this was the result:
I'm pleased with the speed and accuracy we both had in managing our designs. It truly shows our potential as artists!^^ As Michelle corrected the camera angles I opened the storyboard so she could use as reference at the same time. [ As you can see on right hand side]


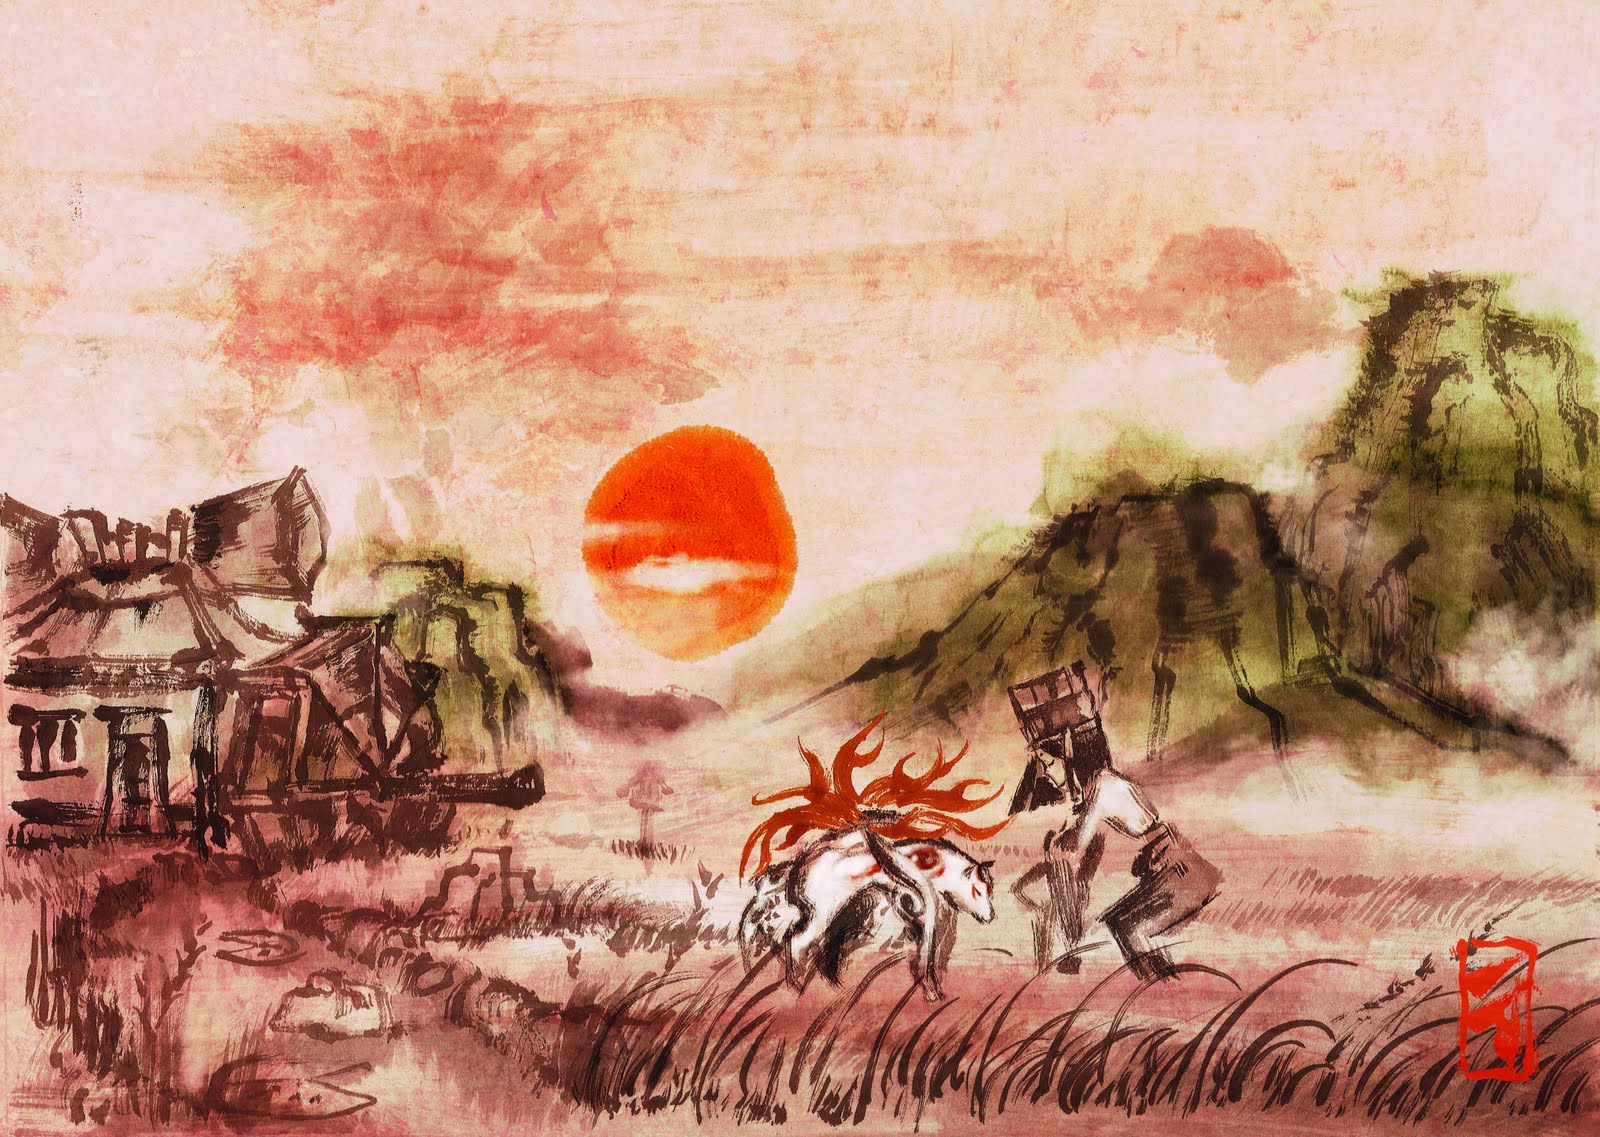
Here's the sketches I did over the holiday! I got most of them from referenced photographs of medieval doors and buildings. And alot from watching sleeping beauty, and sword in the stone.

Perspective Study:


"We decided to try and attempt creating the entrance hall, so we met on Skype and spoke about what direction to go in, and watched clips from 'The Sword in the Stone' and 'Sleeping Beauty' to get a good idea of castle interiors and perspective;"
(Taken from michelles blog)


All for of these images were made BY Michelle through the guidance of my initial sketches of the interiors. For this following week, we'll be tweaking these backgrounds together to form a collaboration of skills, this should technically give a very unique visual appearance in comparison to our past work.


Here are some of Matt's moodboards we try to work close with.


Our colour script came from most of the selection above, so studying the way scenes were texture in Sword in the stone and sleepy beauty was an essential step.

Michelle has also been watching BBC's newest series "Merlin". Matt has also agreed its the perfect setting for our film. I personally havent watched it yet, but I will soon.
The series was filmed at the Château de Pierrefonds in France. heres a few images of it.


Online painting Lessons

http://www.chinese-tools.com/learn/painting

A user on the official tvpaint website posted this link up on the same thread as where I found the chinese paint brushes on TVPaint.

credits to: gugu for the brushes =D

and TVPAINT tutorials:

http://www.tvpaint.com/v2/content/article/support/faq.php

I'll be working with these tutorials for the next few weeks, hope I master the basics of it before term starts =D

Tuesday 4 January 2011

NEW BOOKS^__^

I've actually spent alot of money on animation and THE GREAT Hayao Miyazaki artbooks this holiday. I also bought STARTING POINT 1979-1996 by Hayao Miyazaki. The foreword was written by John Lasseter, the directer of Toy Story. I had no idea he had such admiration for Miyazaki. And now that I've read his foreword, Its definitely understandable how he gives his Pixar employees so much FREEDOM. There was one sentence I loved at the beginning of the book.

"Follow him as he takes his first steps on the road to success, experience his frustrations with the manga and animation industries that often suffocate creativity, and realise the importance of bringing the childhood dreams of the world to life."

This was truely a very POWERFUL start to the book. It was touching in a sense. Although I having planted a foot in the industry yet. Our uni tries to portray the feeling that we already are. I can understand how the industry can suffocate creativity since I've met a director of BBC and publishing companies. They say the same thing. And all have that spark in their eyes when they see talent - when someones able to capture the innocence of a childhood dream.

The book is VERY MOTIVATING, it even has advice from miyazaki aimed at students aiming to working in the industry. The argument of quitting school and moving straight into the industry or actually going university. It makes me feel that much closer to animation in general. Its emotionally in depth. Technical and theoretic conclusions are all included too. Its been a long time since I felt so inspired. Its a feeling that died after finishing my first year at Ravensbourne. I think the technical aspects of 3D animation tend to kill our creativity, everything becomes grey (refering to mayas greyness) and everyone ends up with the same blank expression on their faces infront of their laptop. It became depressing at one point. Even Pixar sticks to TRADITIONAL materials for their pre-production. Its probably because technology is advancing so much, us students tend to fall for the "trend". I even feel we were brain washed into thinking digital art was the only was to go at times. Even working with a Wacom Cintiq and professional painting programs such as Corel Painter, Photoshop. I still feel, it can't beat how expressive traditional materials work with the human mind. I mean, face it, we were born holding crayons and chewing pencils, none of us had wacom graphic tablets to chew on. =DD

Even though I havent finished reading the book, I feel as though I've matured a bit, and I now see the industry in a different perspective from before. I'm going to need to work harder if I want to get anywhere from here... in a good way =D

AND GOOD NEWS, TVPAINT has agreed to ..publish? upload the mayfly film we're currently working on, onto their main website =D So, hopefully, it'll be up to standard^^ I even found chinese brushes for TVPAINT! Made by some china guy.. who named everything in simplified chinese... how convenient ..(sarcasm). I can't read simplified chinese since I studied traditional.. so I might be relying on google translate for the next few weeks =P

Video Conference =D

Today, I say today, I meant this morning. Me and Michelle both planned to start working around 10. We spent an hour or so boosting our creative sparks with useful info we've found through the holidays! I was actually watching Pixar's 25 magic moments at the same time, then shared the link on BBC's iPlayer so Michelle could ABSORB some inspiring information too.

http://www.bbc.co.uk/iplayer/episode/b00x9cdm/Pixar_25_Magic_Moments/

We spent the morning trying to connect our computers together through skype using the "Share Full Screen" feature. By using this tool, we're able to work along side each other as if we were right next to each other in uni. Its proved very useful. We were able to watch each other sketch, 3D model and analyse scenes that needed working on. At the same time, Michelle Print Screened most the things we worked on, so I'll post them up as soon as I can.

For todays agenda..we worked on..
-MEDIEVAL INTERIORS
-BANNERS
-TYPES OF BRICK WORK
-PLANNING THE PERSPECTIVE of the entrance hall/main hall. Both entrance and exit.
-UPDATING THE 3D BLOCKOUT
-REVIEWING MY SKETCHES AND STUDIES
-ADDING MORE FEATURES TO THE EMPTY AREA.
-ASSIGNING JOBS FOR EACH OTHER.

By then it was lunch time, we even analysed sleeping beauty and sword in the stone LIVE on skype. So all that needed doing was some real work.
I'll update the progress visually and in more depth in a new post =D

I find this way of working very convenient, working from the comfort of your own home, while organising and managing projects at the same time. I believe an artist brings out more at home then the work place.

Team Smitten Assembled!!!

Through the holidays we all received a lovely update from Matt =D I was already active; working on the Mayfly project, but it seems team smitten is back in action too! I'm relieved we have such a hard working team! One that's working hard at what could be a child's imagination, a DREAM. =DD

Here is what I've been given to do...

Yuki - keep going with the concepts. Don't use colour just sketch out as many different styles for the main hall as you can and possibly for the stairwell that don slides down as well if you have time.

I have the interiors to decide on. BEFORE breaking off for Christmas, me and Michelle both decided we should collaborate our styles together to create a more expressive feeling. We both have two different style, though our styles also have similarities. Even though we both work in different ways; we metaphorically aim to walk the same road. We have the same aims for the project, so we thought it'll be wiser to work together on backgrounds. Theoretically we should have a stronger outcome.

Two Imagination [X]WORKING ON[X] One background = Something MAGICAL =D

TVPAINT License... annoyance..

After installing TVPAINT, an unlock code is needed. To do this, I've had to register on their main website. With my name,address, number, product code, dongles code... but they never got back to me for a few days. My version of TVPAINT has been running as a trial product all this time.

So, I emailed the guys the same information. They got back to me after 4 days =D
Im now happy to announce I have a fully WORKING PRODUCT^^

TVPAINT

After experience many problems with my windows vista 64bit, I decided to backup everything and finally keep up with the world a bit - by installing Windows 7 64bit. I love using 64bit since its so much smoother! But the problem is, 64bit has alot of problems when it comes to third party software's.. so..basically.. almost everything...

I went out for a meeting with project leader IREDIA. We met up at the 02, so i finally have a copy of TVPAINT Iredia generously bought for me. I feel a boost of confidence from this since it REALLY shows his gratitude, and how much he BELIEVES in my abilities to bring out the best for the project. His script is just so amazing it defeats the idea of uni suffocating creativity within our course.It makes you realised the importance of bringing childhood dreams and innocence into animation,, and the filmic language involved.

After a long day of discussing our progress and future activities for the project. I attempted to install TVPAINT on my desktop computer. - now being a windows 7 64bit. To then realise, 64bit is not compatible with TVPAINT.

....

Frustratingly, I've had to back up all my data again, and re-install windows 7 YET AGAIN to change it to a 32 bit. TVPaint now workd PERFECTLY with my graphic tablet. I've also set up shortcut commands to make life that much easier working in it.

Through the chirstmas holidays and even new year, Ive been watching basic tutorials and drawing tutorials to enhance my skills, touching up on the basics again - doing a bit of life drawing on pose maniacs, drawing cubes, circles.. shading and such =D

I've now realised how hard it is to make a perfect paint brush, alot of experimenting will be needed for me to make one to imitate a chinese paint brush. So i'll be working on painting techniques through out this term.

Character Sheets =D


If you check on the projects main blog,--->> HERE
You will see I developed Iredia's character designs so that the colours really DO empathize the nymph's character, a cute pitiful little guy, for the audience to get attached to and go "awww". The Mayfly's concept is to bring out nobility, a spiritual being that rises to the sky. To then meet its end. We are currently debating what to do with the outlines.

Animated Reference - LINE QUALITY!!

Here's a link I found like last week! I posted a link from these guys on my own blog already, whilst trying to explain the ACTUAL processes of Chinese painting. On their profile, they stated they were attempting to be the FIRST to animate Chinese calligraphy!! Which is very interesting, since i cant find any one else with the same aim. Meaning their my virtual rivals? If we beat them to it during this year, WE'LL be the first perhaps? I think it would be more reasonable to search up the competition, I'm sure there MUST be some students in China.. Taiwan..hongkong.. or even Japan and Korea whose already tried it. These guys have PERFECT line quality since they're experienced in painting with a traditional brush, I admire the fact they they used these skills and digitalised it. They ARE in fact one step ahead of us.


If you check out the video, You'll see, The flower was made in a 3D software, apparently 3Dmax? so they used 3D elements with what seems to be a bit of aftereffects. Having studied the shapes and colours, I've noticed, They very cleverly used the black inked outlines. The flowers DO NOT have an outline. This was an issue me and Iredia was trying to figure out. We DON'T want black inked outlines for everything, but avoiding it, wouldn't make it a Chinese painting. This is something we MUST consider, our decisions could either boost the project visual appearance or TRASH it. So a moderated amount would be needed.

I also found this::


I'm not liking the black outlines at all though, it makes the image very comic. The person obviously never had life drawing classes. Its something I've realised through the years at Ravensbourne. Its becoming very easy to spot out. Although it DOES say this was done in 3D, Im not very sure how. The line quality in the characters were terrible, in Chinese painting, you HAVE to pay attention to line quality, unless the person purposely took on the comic book; chairman mao poster kind of look. This is something to avoid! we wait a more authentic structure, not using other people paintings,but using originals. I find it kind of disrespectful using other artists final master pieces to produce this type of multimedia, since your taking credit for someone else's patients and perception of art.

This LOOKED 2D, it seems the person used aftereffects to cut out the elements, giving them points used for animating. I cant remember the correct term for it, but i remember sitting in on a post production class.They where "pinning points". (I was attempting to render one of my final year projects) I basically sat in someone elses lectures, and the tutor seemed happy us animation students were there to comment on parts. He seemed like a very technical tutor, and was always saying, "this must be so easy for you guys!" But the thing is, us animation students never had an official lesson in after effects, everything was self taught. So since after effects HAS the abilities to bring flat planes to life, we should keep account of this. It could make certain shots much easier to animate if we ever get stuck.


I LOVED this one, But again, it was done in 3D, it makes me wonder, Maybe having a 3D blockout as Iredia mentioned, WOULD help as along our journey to completing this. Having 3D elements really DOES make you go WOW, wait thats not right! I feel we should study this in video in depth since it deals with water. Perhaps after our presentations on monday. we could in fact built a simulation to enhance the feeling of the water effects, or cheat using aftereffects if worse comes to worse. Having to animate everything from our heads is going to be a pain, we know, and it takes great craftsmanship, So I have alot to practice and experiments to do! First things first, I need to get a copy of TVPAINT!

-----------------------------------------------------------------------------------------------------------------

As a team, we had a meeting for 2hours last night? I'm happy we get along, and had the time to generally talk about our life at Ravensbournes, how our project will go and possible changes. It gives me a greater understanding of Iredia's character, and I feel its built a stronger bond between us, which is important since its impossible to help capture someone elses ideas if you have no understanding of the person, especially if your working as a team!! We've had a boost of confidence thanks to our current tutors, so i'll like to thank you too!^^
I'm definitely looking forward to second term! And hope things go so well, our piece will hopefully be sent through award shows? Being the first animated Chinese calligraphy short, with a twist of the Greek-ness from the myth. I believe in Iredia's script. And again would like to THANK YOU DUDE!! =D

Concepts for MAYFLY

I first sketched out the mayfly with a "pencil" brush on SAI, I initially intended to practice drawing the mayfly fro different angles. But this came out quite well!

So... I gave it a black background, knowing its supposed to have that spiritual feel. Having the luminous effect, kind of gold-ish tint.

I used the same water brush strokes as before, with less detail. There was great difficulty getting the proportions right in the head and body. I had to compare it the the character sheet a few times, then tweak it it in different angles to get the right effect. I must admit, the monitor I worked with had a slightly higher contrast, so I didnt see has much green as what you see now. So i'll have to syc the colour ratios to get my future productions looking perfect! Hopeyou like it =D I added a bit of chinese on the bottom image to give you that oriental feel. Since we're using chinese paint techniques =D